
Dairy Queen Country Gravy Recipe
Dairy Queen Country Gravy Recipe testing started in my kitchen last fall. My dad spent ten minutes on the phone describing the gravy from his hometown Dairy Queen in Ardmore, Oklahoma.
Most homemade white gravy turns out pasty or flat. Plenty of recipes skimp on black pepper, and that’s the ingredient that gives diner-style gravy its bite.
Dairy Queen serves this gravy in small tubs next to its chicken fried steak finger baskets. Locations throughout the South and Midwest pour it over crispy strips and Texas toast.
This Dairy Queen Recipe, built from a stovetop roux instead of a packet mix. It comes together in one pan with butter, flour, and milk.

Is Dairy Queen Country Gravy the Same as Sausage Gravy?
People search for this a lot, and the answer is no. Dairy Queen Country Gravy Recipe copies don’t include sausage, and neither does the original. It’s a plain white gravy built on butter, flour, and milk.
Country gravy leans on black pepper and cream for depth instead, which is closer to what Dairy Queen actually serves.
A lot of people also ask why it’s called “country” gravy and not “white” gravy. Both names describe the same base.
Ingredients for Dairy Queen Country Gravy
- 4 tablespoons (56 g) unsalted butter: This builds the roux and carries fat that coats the flour before the milk goes in. I reach for Land O’Lakes since it browns evenly and rarely scorches on me. A quarter cup of reserved oil from frying chicken fried steak works in its place. It adds a savory, meaty backbone butter alone can’t give.
- ⅓ cup (43 g) all-purpose flour: Flour thickens the gravy once it cooks into the butter and forms a paste. Gold Medal is what sits in my pantry, mostly out of habit from my mother’s kitchen. Measure by spooning flour into the cup rather than scooping, or the gravy turns gluey.
- 2¾ cups (660 ml) whole milk: Milk is the main liquid, and its fat content keeps the gravy from tasting watery. Warm it slightly before whisking in for a smoother, faster blend. 2% works in a pinch, though the finished gravy will taste noticeably thinner and less rich.
- ¼ cup (60 ml) heavy cream: Stirred in near the end, cream thickens the gravy faster and softens the sharp edge of the black pepper. Skip it for a leaner, more traditional batch.
- 1½ teaspoons coarse ground black pepper: Pepper is not optional here. It cuts through the fat and milk, which is exactly what makes diner-style gravy taste the way it does. Freshly cracked pepper from a mill tastes sharper than pre-ground tins.
- ¾ teaspoon fine sea salt: Salt wakes up every other flavor in the pan and should go in gradually, tasted along the way. Morton’s fine sea salt dissolves fast and evenly.
- ½ teaspoon onion powder: Onion powder adds a savory background note without adding texture or raw bite the way fresh onion would.
- ¼ teaspoon garlic powder: Garlic powder rounds out the seasoning and pairs naturally with the pepper. A light hand here keeps the gravy from tasting like garlic bread.
- Pinch of cayenne pepper (optional): A pinch of cayenne adds warmth in the background rather than heat up front. Leave it out entirely for a milder, kid-friendly batch.
- ½ teaspoon chicken bouillon granules (optional): Bouillon deepens the savory flavor when the pan drippings are light on flavor. Better Than Bouillon’s roasted chicken base is my usual pick.
Essential Equipment for Making Country Gravy
- Heavy-bottomed saucepan: even heat, no scorching
- Whisk: breaks up lumps fast
- Measuring cups and spoons: keeps roux ratio exact
- Wooden spoon or spatula: scrapes the pan bottom
- Ladle: pours gravy without drips
How to Make Dairy Queen Country Gravy
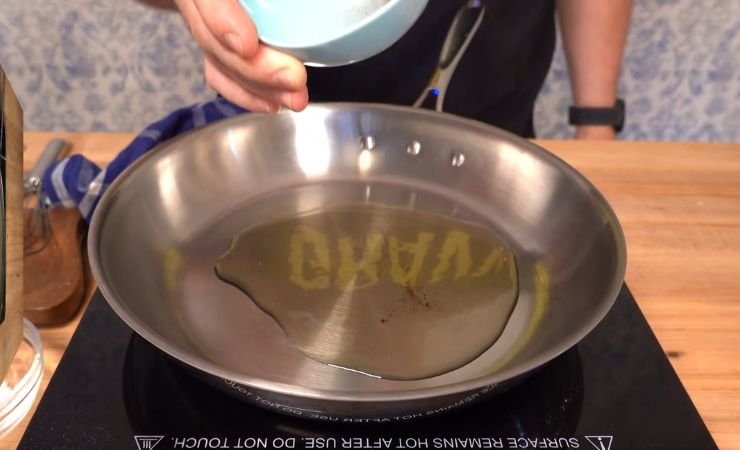
1. Melt the Fat: Melt the butter in a heavy saucepan over medium heat. Reserved drippings from frying chicken fried steak can go in for extra flavor.
A cast iron skillet holds heat evenly and prevents scorched spots. The butter is ready once it stops foaming and turns light gold.
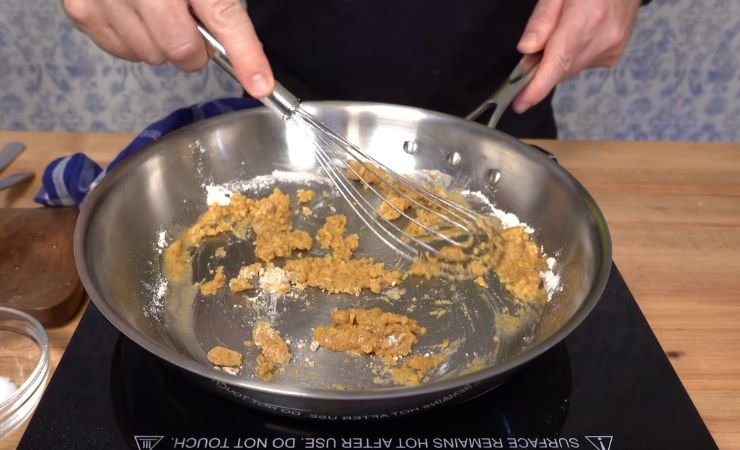
2. Build the Roux: Whisk in the flour, onion powder, and garlic powder. Cook it for two minutes, stirring constantly, until it looks like wet sand.
A roux that stays clumpy needs more fat. Add an extra tablespoon of butter until it smooths out completely.
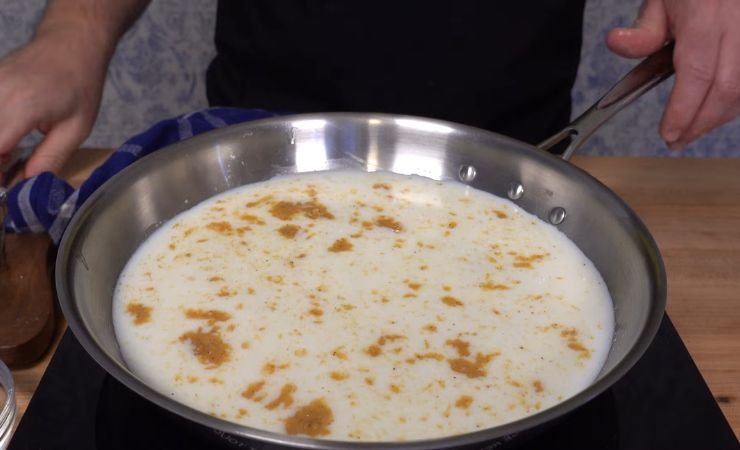
3. Whisk in the Milk: Pour in the whole milk gradually, whisking the whole time to keep lumps from forming.
Cold milk against the hot roux works best for a smooth result. Small bubbles at the edges of the pan mean the milk is heating properly.

4. Season and Simmer: Add the black pepper, salt, and cayenne, then bring the gravy to a gentle simmer. Let it bubble softly for six to eight minutes, stirring often.
Pepper is the ingredient that separates bland gravy from the diner-style batch Dairy Queen fans expect.
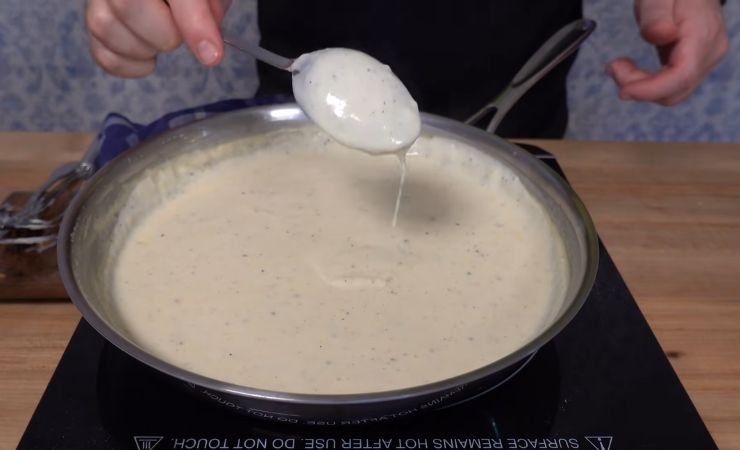
The gravy is ready when it coats the back of a spoon. Drag a finger through it, and the line should hold.
5. Stir in the Cream: Pour in the heavy cream and stir for one more minute over low heat. This thickens the gravy faster and smooths out the pepper’s sharp edge.
The gravy turns from thin and glossy to matte and clingy once the cream fully absorbs.
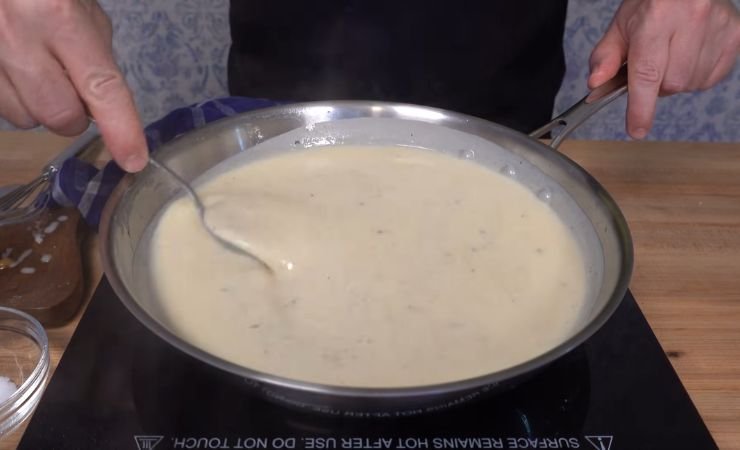
6. Taste and Adjust: Taste the gravy and add more salt or pepper in small amounts. A splash of milk loosened gravy that turned out thicker than expected.
This is the point where homemade gravy finally tastes like the tub from the drive-through.
Alternative Ways to Prepare Country Gravy
An Instant Pot works too, using the sauté function instead of a burner. Melt the butter, build the roux, and add milk the same way. Just watch for hot spots near the base of the pot.
A slow cooker won’t build the roux itself, but it holds finished gravy warm for hours without breaking it. Make the gravy on the stovetop first. Transfer it to the slow cooker on the warm setting for a brunch spread.
The texture stays closest to the original on the stovetop. Direct heat gives faster feedback than the Instant Pot’s thicker insert.
Tips, Tricks, and Common Mistakes to Avoid
Lumpy Gravy Fix: Strain it through a fine mesh sieve, then whisk it back over low heat for thirty seconds.
- Too Thin After Simmering: Mix one teaspoon of flour with two teaspoons of cold water, then whisk it in.
- Too Thick After Cooling: Add warm milk one tablespoon at a time until it loosens back up.
- Gravy Tastes Flat: Add a little more salt first, then black pepper, since salt usually solves it.
- Skin Forms on Top: Press plastic wrap directly onto the surface the moment you take it off heat.
- Burnt Bits in the Pan: Strain the gravy immediately, and don’t scrape the bottom while whisking.
Delicious Variations on Dairy Queen Country Gravy
Sausage-Studded Version: I brown a half pound of breakfast sausage in the pan before the butter goes in. It turns this into a heartier sausage gravy, good over biscuits on cold mornings.
1. Jalapeño Kick: Diced pickled jalapeños stirred in at the end add sharp heat. My husband asks for this version every single time.
2. Bacon Fat Base: Swap the butter for reserved bacon fat, and skip the added salt since bacon brings its own. This version leans smoky, served over hash browns.
3. Extra Peppery Diner-Style: I double the black pepper and skip the cayenne completely. This is closest to what Dairy Queen actually serves in its tubs.
4. Herb-Flecked Brunch Gravy: A teaspoon of chopped fresh thyme stirred in near the end brightens the whole pan. It pairs well with a weekend egg spread.
5. Dairy-Free Swap: Plant-based butter and unsweetened oat milk replace the dairy versions. The texture stays close, though the flavor turns slightly sweeter.
What I Serve With This Country Gravy
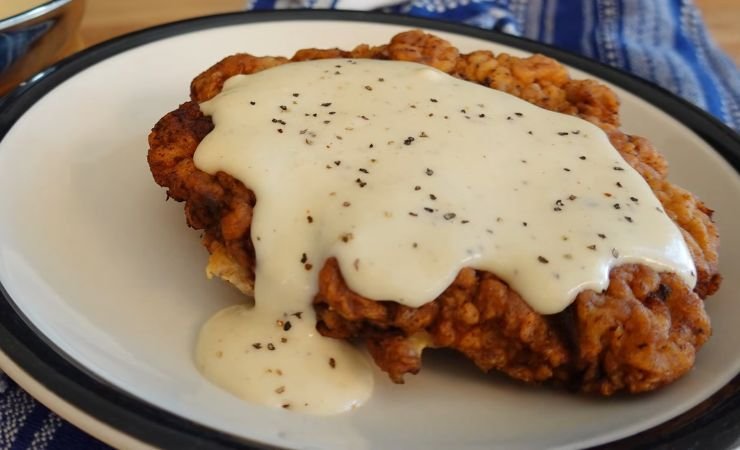
Chicken fried steak is the classic pairing, especially with mashed potatoes soaking up the extra gravy on the side.
Biscuits are another obvious match, split open and ladled generously right before they cool. Crispy hash browns work well too, since the gravy clings to every ridge.
For a full spread, I fry steak, bake biscuits, and mash a pot of potatoes with butter. Everything gets a ladle of gravy right at the table, still steaming.
How I Store This Country Gravy
This gravy keeps well for up to 4 days in the fridge, sealed in an airtight container. It thickens a lot once it’s cold, almost like pudding. A splash of milk whisked in over low heat brings it right back to pourable.
I don’t recommend freezing it. The dairy tends to separate once thawed, leaving a grainy texture that whisking can’t fully fix. Reheat gently on the stovetop, stirring often, rather than blasting it in the microwave, which can break the sauce.
Dairy Queen Country Gravy Recipe FAQs
1. Does Dairy Queen Country Gravy Contain Meat?
No. This is a plain white gravy, built on butter, flour, and milk, with no sausage or meat drippings required.
2. What Pan Is Best for Lump-Free Gravy?
A heavy-bottomed saucepan or a well-seasoned cast iron skillet spreads heat evenly and helps prevent scorched spots that cause lumps.
3. Can I Make This Gravy Ahead of Time?
Yes. Make it up to a day ahead, then reheat slowly on the stovetop with a splash of milk to loosen it back up.
4. How Spicy Is Country Gravy?
Barely spicy at all. The pinch of cayenne adds warmth in the background, not heat, and it’s easy to leave out entirely.
5. Why Did My Gravy Turn Out Lumpy?
The roux likely met cold milk too fast, without enough whisking. Strain the finished gravy through a fine mesh sieve to fix it.
6. Why Is Black Pepper Important in Country Gravy?
Pepper cuts through the fat and milk, balancing the richness. Without it, the gravy tastes flat and one-note.
Dairy Queen Country Gravy Recipe

Dairy Queen Country Gravy Recipe makes creamy, peppery white gravy with butter, flour, milk, and cream in just 17 minutes.
Ingredients
- 4 tablespoons (56 g) unsalted butter
- ⅓ cup (43 g) all-purpose flour
- 2 ¾ cups (660 ml) whole milk
- ¼ cup (60 ml) heavy cream
- 1 ½ teaspoons coarse ground black pepper
- ¾ teaspoon fine sea salt
- ½ teaspoon onion powder
- ¼ teaspoon garlic powder
- Pinch of cayenne pepper, optional
- ½ teaspoon chicken bouillon granules, optional
Instructions
- Melt the Fat: Melt the butter in a heavy saucepan over medium heat. Reserved drippings from frying chicken fried steak can go in for extra flavor. A cast iron skillet holds heat evenly and prevents scorched spots. The butter is ready once it stops foaming and turns light gold.
- Build the Roux: Whisk in the flour, onion powder, and garlic powder. Cook it for two minutes, stirring constantly, until it looks like wet sand. A roux that stays clumpy needs more fat. Add an extra tablespoon of butter until it smooths out completely.
- Whisk in the Milk: Pour in the whole milk gradually, whisking the whole time to keep lumps from forming. Cold milk against the hot roux works best for a smooth result. Small bubbles at the edges of the pan mean the milk is heating properly.
- Season and Simmer: Add the black pepper, salt, and cayenne, then bring the gravy to a gentle simmer. Let it bubble softly for six to eight minutes, stirring often. Pepper is the ingredient that separates bland gravy from the diner-style batch Dairy Queen fans expect. The gravy is ready when it coats the back of a spoon. Drag a finger through it, and the line should hold.
- Stir in the Cream: Pour in the heavy cream and stir for one more minute over low heat. This thickens the gravy faster and smooths out the pepper's sharp edge. The gravy turns from thin and glossy to matte and clingy once the cream fully absorbs.
- Taste and Adjust: Taste the gravy and add more salt or pepper in small amounts. A splash of milk loosened gravy that turned out thicker than expected. This is the point where homemade gravy finally tastes like the tub from the drive-through.
Nutrition Information:
Serving Size:
1Amount Per Serving: Calories: 195
Testing taught me pepper does most of the work here, not cream or butter. Adjust the pepper up or down each time, based on what you’re serving it with. A cast iron skillet and a steady whisk get you most of the way there.
Pour it hot, right after it coats the back of a spoon. That’s the moment it tastes closest to the tub from the drive-through window.